Field pressure testing of PVC pipelines has proven to be a contentious issue in South Africa, with consulting engineers and installers often having different interpretations of how testing should be conducted. DPI Plastics has developed a ‘how-to’ guide on field pressure testing to ensure that the integrity of a pipeline is not compromised as a result.
Also read:Factors to consider when looking for HDPE pipes and fittings
Modern plastic pipes are manufactured under controlled conditions and the testing regime at the manufacturing facility includes hydrostatic pressure testing of pipes and joints. This ensures that they are capable of delivering on minimum performance requirements. When the pipe is laid on site, however, pipes are joined outside the control of the pipe manufacturer.
The field pressure test is therefore used to test the integrity of the pipe joints which were completed on site. This test is covered by the SANS 2001:DP2 – Medium pressure pipelines standard. DPI Plastics product manager Renier Snyman notes that although the standard attempts to lay down the rules thoroughly, it is often misinterpreted or misunderstood. “The most commonly misinterpreted test parameters are pressure, duration and length,” he explains.
Snyman stresses that it is important to check the condition of test equipment like end caps, hoses and pressure testing machine prior to commencing the test. “If equipment leaks, the test will be compromised. Calibration of test equipment, especially pressure gauges, should be checked. Inaccurate pressure gauges will not only compromise the integrity of the test, but may lead to over-pressurisation and subsequent damage of the pipeline.”
All pipes require large volumes of water to conduct a field pressure test, and Snyman advises that a check should be undertaken to ensure that there is sufficient water available on site prior to the commencement of the test. “What’s more, any concrete work, like thrust blocks, should be given sufficient time to reach full strength prior to testing, in order to preserve their integrity.”
Temporary end caps fitted for testing purposes should be restrained against end load movement under pressure. “It is important to bear in mind that end load forces are high and restraints for end caps must be able to withstand these forces. For example, 500 mm class 12 PVC pipe subjected to 18 bar pressure generates an end load of approximately 18 tons directly onto the end caps.
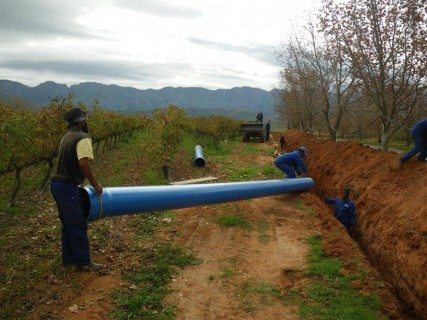
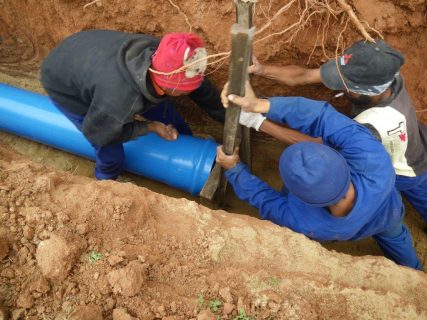
According to Snyman, the pipes also have to be properly backfilled in order to keep them from rising up from the trench during testing. “It is important to keep the joints exposed, however, as it will make inspection for leaks much easier and quicker,” he continues.
Determining test length
Pipelines can sometimes be several kilometres long, and it is therefore beneficial to test the pipeline in sections. “This method is more accurate and takes less time to inspect the joints. It also requires less water for each test, and is quicker to fill the line. If a problem arises, it will also be noticed sooner and can be rectified before kilometres of pipeline is laid,” Snyman points out.
Requirements for determining the test pressure
The reason for performing the pressure test is to establish that the pipeline does not leak. Test pressure is raised above the operating pressure of the pipeline to allow the pipeline to settle under that pressure and to highlight possible leaks that would otherwise only develop after some time under pressure. With this in mind, the following requirements for test pressure are set out in SANS 2001: DP 2.
First requirement: The test pressure must be 1.5 times the working pressure of the pipeline, up to a maximum of 10 bar. Above 10 bar, the test pressure must be the working pressure of the pipeline plus 5 bar. The requirement refers to the working pressure of the pipeline, i.e. the pressure the pipeline will operate under. It does not refer to the pressure class of the pipe.
For example; a pipeline with an operating pressure of 16 bar should be tested at 21 bar (16 bar + 5 bar). Snyman notes that the mistake is often made to test at 1.5 times operating pressure, regardless if the operating pressure is above 10 bar or not. “In this case, the difference between the correct pressure above and a 1.5 times operating pressure (24 Bar) is 3 bar.”
Second requirement: The test pressure must be between 1.25 times and 1.5 times the operating pressure at any point in the pipeline. This requirement makes allowance for variation in the test pressure. Due to differences in static head in the test section, it allows the test pressure to vary between 1.25 and 1.5 times the operating pressure at any point along the test section.
Test procedure
Once the section of pipeline is ready for testing and the ends have been sealed and secured, Snyman states that it is advisable to fill the line slowly, to ensure that air is not trapped during the filling procedure. “It is also preferable to fill the pipeline from the bottom to push air out at the top of the pipeline. A breather should also be left open at the top of the pipeline for air to escape.”
If filling the pipeline from the highest point, Snyman advises allowing sufficient time for air to settle to the top before starting the test. “It is good practice to leave a filled pipeline for 12 hours for air to settle at the highest point. The air must be removed before commencing the pressure test.”
When determining the test pressure, it is important to consider the location of the pressure gauge on the pipeline. If the pressure gauge is at the highest point along the test section, one has to add the static head (vertical height difference in metres between the lowest and highest points) of the test section to the reading on the pressure gauge.
After pressurising the test section slowly, the stop ends and thrust blocks should be checked for movement. If movement is detected, the test must be immediately terminated for repairs to take place. Once the pipeline has reached test pressure, the joints must be inspected for leaks. If leaks are found, the pipeline should be de-pressurised, and leaks repaired before restarting the test.
“If there are no visible leaks and the pipeline has stood under test pressure for the required duration, close the isolation valve between the test equipment and the pipeline. After an hour has elapsed, restore the test pressure and measure the amount of water needed to do so in litres. SANS 2001: DP 2 contains equations, depending on the pipe material, to calculate the allowable amount of water, in litres, needed to restore test pressure in the pipeline,” says Snyman.
As an example we consider a test section of 250mm PVC-U Class 16 pipe, 500m long. The equation for PVC pipes is as follows: 0.01 x OD mm x Test Length km x √Test Pressure MPa. Therefore 0.01 x 250 x 0.5 x √2.1 = 1.811 litres. Snyman highlights that if more than 1.811 litres of water is needed to restore test pressure, the test failed and one should find the leak before retesting.
Test duration
Although SANS 2001: DP 2 is specific about the test duration, Snyman warns that the prescribed duration is not well-known and often not adhered to. “I have come across pipelines that have been pressurised and left for 24 hours under pressure. Such practices not only defeat the objective of the field pressure test, but may also damage components in the pipeline.”
He reveals that the test duration is three hours for pipes of nominal diameter 400 mm and above, and between one and three hours for pipes of nominal diameter below 400 mm. During this time, the pressure inside the pipe should be maintained by means of a suitable pump.
Once the test duration has elapsed, an additional hour is needed to perform the allowable pressure drop test. If the pipeline fails the pressure test, the leak needs to be located, repaired and the test repeated. “All air must be bled out of the pipeline before repeating the test,” observes Snyman.
Conclusion
Anyone performing a field pressure test should inspect test equipment beforehand to ensure it is calibrated and leak free. When pressurising the pipeline, one should take into account the location of the pressure gauge and any static head that may add to the test pressure.
“It is very important to ensure that all air is removed from the pipeline before pressurisation and to pressurise the pipeline slowly. If the correct test procedure is followed, one can be assured of accurate test results and long service life from the pipeline,” Snyman concludes.
About DPI Plastics
DPI Plastics (Pty) Ltd is a leading manufacturer of PVC and HDPE water reticulation and drainage pipe and fitting systems with two ISO 9001 certified South African factories based in Johannesburg and Cape Town.
Source: www.dpiplastics.co.za
Detailed information I needed !!! Thank you
TNX SO MUCH BE SUCCESFULL:
http://www.digimobileco.ir/