Many homeowners use quality materials in building their homes. Aside from using solid materials, they also use cement render to solidify how neat their house could be and protect it from the harsh elements outside. If a render gets dirty or peels, they can apply another after chipping it out. It’s that simple.
However, the trick is using a reliable and tough cement render that can give your home an upgrade and a stylish and pleasing look. And in this post, you’ll discover the best tips for using or applying rockcote cement render for your home’s facade or interior walls:
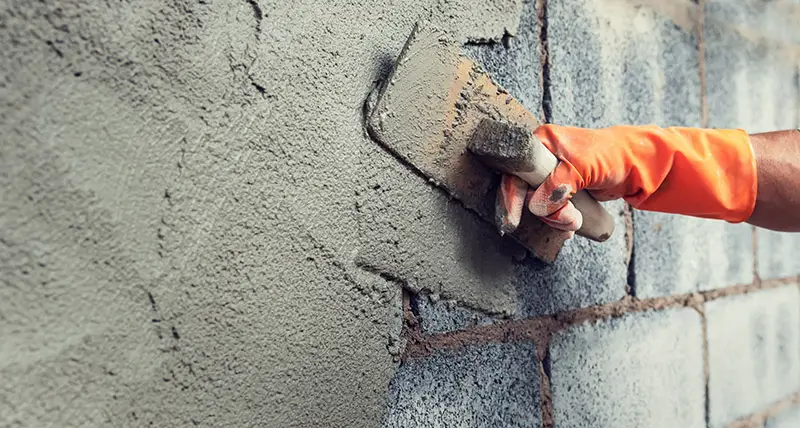
1. Always Use A Sharp Blade And A Metal Float
When applying rockcote cement render to your walls, ensure that your tools are sharp. You could risk damaging the wall’s surface and creating an uneven finish if you don’t have a sharp blade. You should also use a metal float instead of a wooden one.
Metal floats are considered more effective at smoothing bumps or ridges than a less durable alternative. If you’re unsure what type should be used, you can always ask your local hardware store for their opinion on the best way to proceed with your project.
2. You’ll Get A Smoother Finish If You Don’t Mess With It Too Much
While Rockcote cement render is a forgiving product, you should still avoid a few things to get the best results. One of these is reapplying to render too often. It can significantly help you achieve desired results if you don’t do it.
Once your first application has dried, wait until it’s fully cured before applying another coat. Ideally, let the first coat dry fully for at least 48 hours. If you keep applying fresh render over wet layers of the old coating, they’ll tend to stick together and can form an unpleasant lumpy mess once they finally dry out.
In addition, don’t apply too much at once, if possible. It can be tempting to plaster on lots of rockcote cement render, considering how easy it is to work with. However, note that your walls will be set in about 30 minutes, and you must wholly and evenly cover your surface area before letting it dry. And so, by applying bit by bit, without excess, you can achieve your goal with what you have. You wouldn’t want your walls to be unappealing even after maximizing a render to secure your walls.
3. Keep Your Arms Straight When Applying The Render
One of the most important things to remember when applying cement render is to keep your arm straight. This can help you achieve a more precise rendering result, as compared to a messy job if you keep on waving the blade around without much care.
To ensure that you’re keeping your arm straight, move it in one direction at a time. You can consistently move it back or front instead of moving your arms up and down and side to side. Think of it like you’re an artist painting a house. A tip to note is to ensure that your reach doesn’t exceed 12 inches or 30 cm., so you’ll be able to achieve even application of Rockcote cement render over previously applied surfaces such as concrete blocks, etc.
4. Only Work On One End Of The Wall At A Time
Only work on one end or part of the wall at a time; that way, it doesn’t dry out. Doing so can help ensure the consistency and uniformity of how each wall portion dries out.
Opting to apply render over large areas, instead of taking it bit by bit, can leave your wall with a big mess, as each part of the wall you didn’t complete will dry out. And in some cases, you may be forced to start all over again. And so, the best thing to do is, if you’re not done with a section of the wall, don’t move to the next just yet.
5. Always Wet The Sponge Before You Start Cleaning Up To Avoid Swirl Marks
Once you’re done with the first layer, finishing comes next. For a sponge-textured finish, it would be best to use a damp sponge rather than a dry one to go over your work.
Note that you could risk creating swirl marks in your render if you use a dry sponge. And while a damp sponge can help make the job much easier and avoid unwanted paint marks, it’s still essential to exercise extra care when doing this and not allow excess water to run down the finished wall.
Conclusion
Sometimes, you don’t need to complete a house renovation for your home to have a polished look. You can apply rockcote cement render to improve the quality of the walls and protect them against harsh weather conditions. This would be part of an overall plan that relies on a renovation checklist to ensure that you have all the basics covered.
And hopefully, with the pro tips outlined above, you can be guided on how to apply and utilize such material and give your home a fresh and clean look.