
If the thought of building and installing anything sends you into a panic attack, take a deep breath. We’re only talking about installing a carport and not putting together your child’s latest unassembled toy. Whether you purchase a kit or the sections of your carport separately, the process can be surprisingly easy.
To help ensure you can complete the process, here’s a step-by-step guide to building a carport. Who knows, after completing your carport you may be ready to help family and friends install theirs.
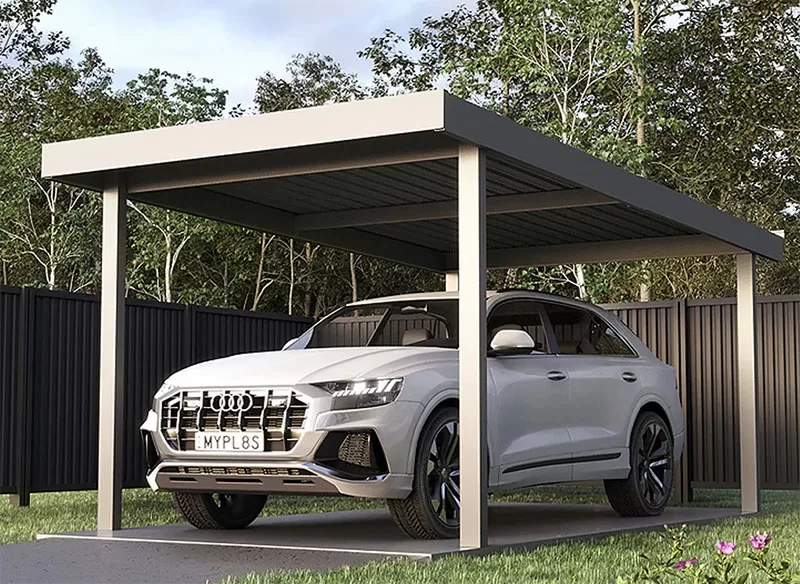
How to Build a Carport in a Few Simple Steps
If you want to skip the expense of hiring professional builders, you can follow these simple steps and have your carport ready for use in no time. Best of all, you can complete the project without running into any additional costs.
Measure the Carport’s Intended Location
Your carport needs to go somewhere on your property. Preferably close to your house, especially if you’re using the carport for vehicle storage. You don’t want to trudge across your property every time you need to use your vehicle.
Before you start hunting for the perfect location, take a minute to measure your vehicle. This typically affects the carport’s size. You want the structure to be large enough to completely cover your vehicle. If the front or rear end is sticking out of the carport, it’s at risk for damage from the weather and other factors.
So, if you’re using the carport for a sedan, you’re probably going to need one a little larger than 6 x 15, which is the average measurement of a four-door sedan. Larger vehicles like RVs vary in size but plan on purchasing a carport that measures at least 12 x 35. If you’re planning on storing additional items in the carport like a motorcycle or lawn mower, don’t forget to include this in your measurements.
Once you have a good idea of the carport’s size, you can start looking for a suitable location. Along with being close to the house, you also want the ground to be relatively flat. Measure the area to ensure it can accommodate a carport and you’re ready to move onto the next step.
Gather Your Tools
You’re going to need a few tools, even if you’re using a carport kit. A kit typically comes with anchors, just make sure they’re the right ones for your foundation type.
If you’re purchasing everything separately, this means buying anchors. Once again, purchase the right type of anchors. You’re also going to need the following:
- Power drill
- Tape measure
- Hammer
- Power saw
- Level
- Nails and fasteners
- Framing studs, either wood or metal
- Wood or metal sheets
- Ladder
- Shovel
You also want to grab your safety gear which should include gloves and protective eyewear. Dirt, sand, and debris can easily get in your eyes. The gloves can help protect your hands from painful blisters.
Get the Foundation Ready
Grab your measuring tape and figure out precisely where you’re installing the carport. After measuring and marking the location, it’s time to start laying the foundation. If you’re going with a dirt or gravel foundation, you probably only need to level off the area. You don’t want to install a carport that ends up tilting to one side.
You should plan on using concrete regardless of the type of foundation. You get a lot more stability with concrete compared to dirt or gravel. If you prefer dirt, no worries. You can dig holes for the anchors and pour concrete in to provide additional support. This method is pretty similar to digging post holes for a fence.
If you don’t mind using a bag or two of concrete and have a little bit of extra time, consider laying a concrete foundation. Concrete typically takes anywhere from 24 to 48 hours to dry, but the extra time may be worth the additional stability you get.
If you’re concerned about the impact concrete can have on the environment, you have an eco-friendly option. You can use green concrete, the material has less of a carbon footprint than traditional building materials.
Assemble the Frame and Any Panels
Okay, your foundation is ready and the anchor points are in the ground. This means your support poles are also installed. The anchor points go through pre-drilled holes in the base rail. Make sure the pointed end is down. This is the part of the anchor that holds the frame in place.
A simple way to install a carport frame is to start at one end. Insert an end pole with the base rail and repeat the process until all support posts are securely in the ground. Don’t be afraid to give each anchor a hit with the hammer, as this can help make sure that the anchors are firmly in the holes.
If you’re building an enclosed carport, it’s time to start inserting the panels. Whether you’re using a kit or separate pieces, inserting panels is a piece of cake. The panels attach easily to the frame. Just keep working your way down one side until all of the panels are attached. Repeat this for the other side.
Attach the Roof
You’re going to need your ladder for this last step. You’re not going to be able to secure the roof without a ladder. You also don’t want to put your weight on the roof.
Carport roofs aren’t designed to hold a lot of weight. Even heavy snow accumulation can cause a carport roof to buckle. This can be a particular issue with lighter aluminum roofs.
Use the nails and fasteners to attach the sections of the roof, working your way up to the top from the bottom. As you’re attaching each section, double-check to see if you’re leaving any gaps. You don’t want the roof leaking the first time it rains.
Installing a Carport Is Easier Than You May Think
You can install a carport without any professional assistance, and it shouldn’t take you more than a day or two, though this can depend on the concrete drying time. Whether you’re using a kit or installing each piece separately, building a carport is often easier than you may think.
With the right tools and a clear plan, you’ll be surprised at how quickly the project comes together. Plus—the satisfaction of completing it on your own adds an extra layer of accomplishment to the finished product.