OKOndt GROUP™ offers both a standard line of Nondestructive Testing (NDT) instruments and custom equipment and probes built to individual customer specifications and for special materials. In addition to portable devices, they build large, integrated inspection systems, covering most NDT technologies. Their significant investment in research and development allows them to provide optimized solutions for all of NDT customers.
Guarantee safe exploitation of rails
In order to guarantee safe exploitation of the rails, NDT inspection methods are applied for the damages detection on the rails. The first thing among them is ultrasonic rail testing. Nowadays, the loading on track is constantly increasing due to the general traffic increment and use of high-speed trains. Rail damages increasingly occur on the rail head running surface as a result of rolling contact fatigue–RCF. These damages are the most dangerous during the track service as this may result in transverse cracks development and cause rail breakage.
With regard to implementation of compatibility of the European rail systems, the railway infrastructure managers shall pursue a plan for each rail line servicing. This plan also includes ultrasonic testing of railway track for the surface flaws testing and evaluation, caused by RCF (rolling fatigue).
There are two main RCF types: «Squats» and “Head Checking”–further HC. These surface rail defects have significant differences between them with regards to the mechanism of their development and growth. «Squat»-type defects represent a complex process of interaction «Wheel-Rail», and appear during micro-sliding of a wheel, that in turn launches the mechanism of plastic deformation of the rail head running surface. This type of defects is similar to the «Wheel burn» type defect, but has its distinctive features: 1. “Squat” type defect development requires several months in comparison to the «Wheel burn» which appears immediately. 2. “Squat” type defect is not a pair one which is distinct to the «Wheel burn» that has a pair on the neighboring rail.
HC defects can occur on any track segment, even on the weld joints. However, most frequently these can be observed in the curves with insufficient external rail gradient. HC growth is facilitated when water or couplant are in contact with the damaged area. HC micro-crack growth can be split in two phases–primary phase of a slow growth, when a crack depth does not exceed 3-5 mm, and length–20 mm, and a quick growth phase causing a rail breakage.
In the UIC 712 R rail track defects classifier the above defects are designated as follows: «squats» (cracks and local depressions on the rail head running surface)–a defect with a code «227» and «head checking» (singular or group defects on the rail on the rail gauge face in the form of small parallel cracks)–with a code «2223».
Ultrasonic methods and sounding schemes for rails on the European railways, Head Checking (HC) type defects detection problems
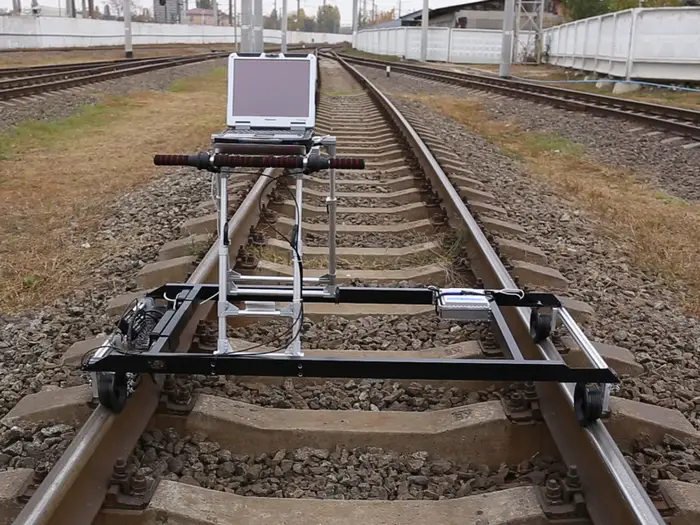
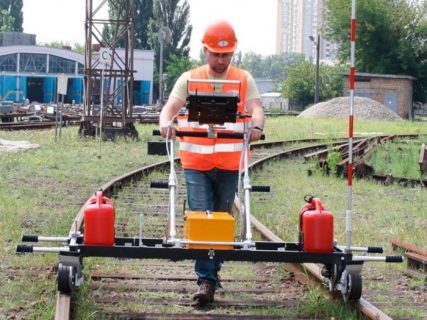
On the European railways, both the high-speed testing systems for rails laid down in the track (scanning speed starts from 40 km/h and more), and portable/mechanized single- and double rail inspection trolleys (scanning speed does not exceed 4 km/h) are applied. In such systems, the classical sounding schemes are implemented, in accordance with EN 16729-1:2016 Railway applications. Infrastructure. Non-destructive testing on rails in track. Requirements for ultrasonic inspection and evaluation principles.
The testing is performed with the following probes: 1 dual element transducer of 4 МHz 0°, 2 single element transducers of 2 МHz ±70°, and 2 single element transducers of 2 МHz ±45°. The probes for scanning are placed in the central part of the rail head. Such sounding scheme allows for the reliable defects detection with a code 227—“Squat”, located in the rail head running surface center–with 0° and 70° probes. Regarding the HC and “Squat” defects types, off-centered to the gauge face side, these can be detected only at a stage when one of the cracks is developed so that it extended to the rail central cross-section–i. e. when there is a threaten of a rail breakage.
In order to resolve HC (Head Checking) detection issue, the company applied a special probe with 58° probe angle, and ±34° angular orientation relative to the rail longitudinal axis. Such probe is implemented in single rail flaw detector UDS2-77 and double rail flaw detector UDS2-73 scanners. That enables testing of the field faces of the rail head. Considering a rail head configuration this sounding scheme also can be applied for testing of the rail head top radius.


Leave a Reply