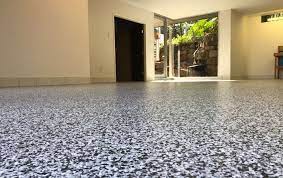
This is one of the most durable and toughest surfaces to get for your spaces and below we have summarized the proper steps to installing an epoxy floor. The coating is usually applied for garages, but can as well be used on sunrooms, driveways, basements, and patios. You will first need to make sure that the layout will well fit for your floor. Then you can clean and prime your surface, choose and purchase the suitable epoxy product, mix and smear on your surface. The steps include:
1. Remove floor paint and scrub the concrete surfaces.
You cannot lay out a sustaining epoxy floor if you apply over polyurethane or latex floor paints.
If your floor is engulfed with these kinds of surfaces, you will have to strip it before you start the epoxy application. You will also need prepare the surface to ensure adhesion between the substrate and the epoxy product. A flat-edged shovel or scraper works better when removing hardened debris. The next step when laying out an epoxy floor is to vacuum the surface. Make a degreasing/cleaning solution as per the manufacturer’s directions. Apply the solution using a stiff-bristle brush to scrub off any oil or grease stains while wearing rubber gloves. The surface needs to have a slightly rough profile to allow a mechanical bonding between the epoxy primer and the concrete surface.
2. Wet flooring.
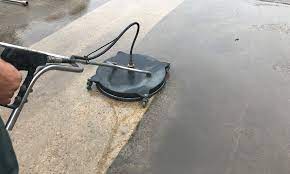
Deploy a hose to wet the whole surface with water. Using a power scrubber, brush and a degreaser, clean the whole surface.
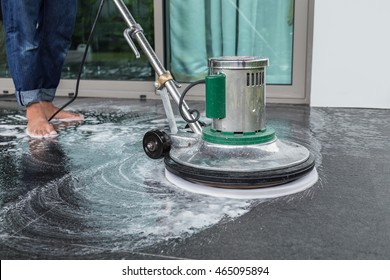
Using the stiff-bristle brush, scrub along the walls and corner parts where the machine can’t reach. After cleaning use a rubber squeegee to remove soapy water into a central part. Draw out the solution with a wet-dry vac. Vacuum up any remaining cleaning debris or products. Deep clean the surface using the pressure washer.
3. Etch the floor to layout an epoxy floor.
Pour five litres of water into a plastic sprinkler container. Wear a vapor respirator and pour 12 ounces of 32% muriatic acid into 15 cups of water in the sprinkler can or as directed by the manufacture.
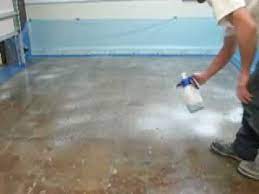
Stir the concoction for some seconds using a paint stirrer. Discharge the mixture evenly over an area of 10×10-foot. Power-scrub the area you’ve poured the mixture for 10 minutes. Repeat the process until the whole floor is acid etched. To flush acid residue, rinse the floor thrice and leave it to dry overnight.
Read also: Factors to keep in mind when installing epoxy flooring
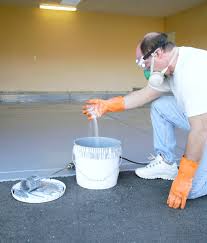
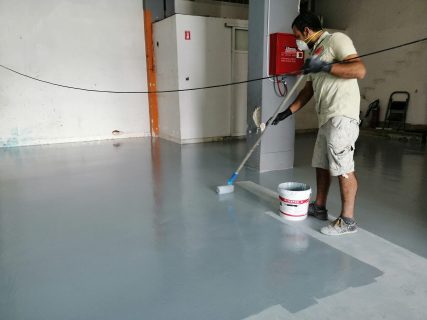
4. Apply the first coat of epoxy paint.
Following the instructions from the manufacturer on laying out an epoxy floor, mix two epoxy solutions using a drill and stirring bit. To allow complete blend between the mixtures, pour it into another container and mix it again.
You can now apply the epoxy coating in the perimeter of your floor where the roller cannot apply.
After applying in the perimeter, get a 9-inch-wide roller with a medium nap and paint the other surface. The roller should be attached to a pole the sock the roller into the bucket of epoxy so only the bottom half of the roller is covered. Ensure edges remain wet as you move to different parts to prevent formation of noticeable seams. Also ensure all the new holes and cracks are sealed & filled before beginning the next coat. Wait for the first coat to dry as per manufactures instructions before re-coating.
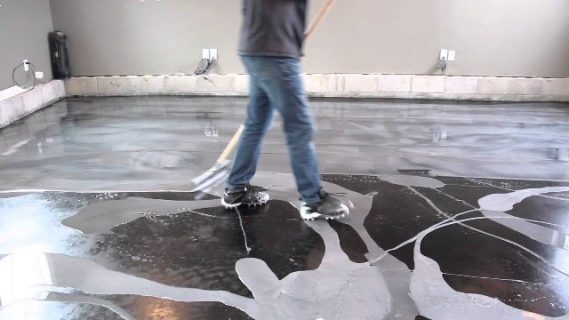
5. Apply the second coat.
If you don’t need a glossy floor which are slippery when wet, mix the second coating epoxy mixture with a non-skid floor coating.
Mix thoroughly with the drill and stirring bit. Use a high-quality roller or spread out the product using a squeegee, and then deploy a roller to get a uniform surface. Spiked shoes will help you go around the wet coating to inspect. If you need to add color flakes, scatter them lightly while the surface is still wet, scatter more flakes until you form your desired pattern.
6. Finish your epoxy floors.
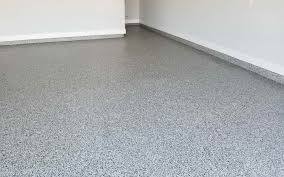
You can paint the bottom 4 inches of the basement wall with the epoxy mix used on the floor to layout an epoxy floor with a cohesive look and also acting as a protective baseboard.
Comments
One response to “How to install an epoxy floor in 6 easy steps”
Great! When it comes to long-lasting garage floor protection, epoxy flooring is a wonderful choice. It’s simple to install and maintain, and it can completely transform the look of your garage or basement. It’s also a fun DIY project.