
Whatever your project is finishing a garage or a basement or building an addition, it’s significant to get the rough-in wiring done right the first time.. With these tips in hand, you’ll work faster, avoid catastrophes down the road and put a smile on the face of your electrical inspector.
Install the right box
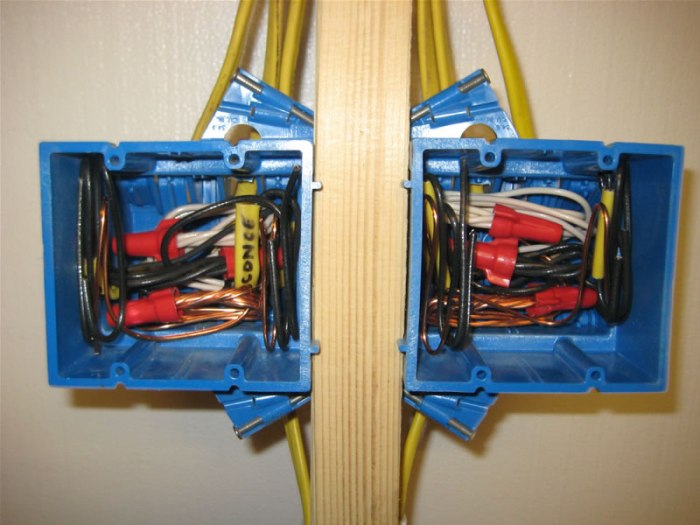
Either plastic or fiberglass boxes will do the job, or each one is totally code compliant. Some electricians prefer fiberglass ones because they’re tougher, but others prefer the plastic ones because they’re cheaper.
No matter what style you opt for , pick box sizes that have a volume of at least 20 cu. in. Dimmer switches and other smart devices are widespread these days and take up more room in the box than the simple devices of the past. Plus, bigger boxes just make wiring easier, particularly if they’re crammed full of wires and connectors. Boxes destined for exterior walls and ceilings must be outfitted with a vapor barrier seal.
Use special staples for stacking cable
Staples (and drilled holes) need to be at least 1-1/4 in. away from the edge of a framing member. In some cases, that means stacking wires on top of one another and using one staple to secure them. Most standard staples can handle two wires. Don’t install staples over several wires unless the staple is approved for it. The staple package should list how many wires it’s rated for. The staple shown here is good for up to four wires.
Install plates before pulling wire
Electrical cables need to be set back 1-1/4 in. or more from the edge of a stud or wood-framing member to protect cables from wayward nails and screws. Install steel cable-protection plates over holes drilled closer to the edge. Keep a number of plates in your pouch while you’re drilling and install them right away so you don’t forget.
Drill straight aligned holes
Keep the holes straight and at the same height. Pulling cable through numerous consecutive holes drilled at different angles or heights is hard because the cable will snag on the sharp edges and fight you the whole time! Straight, aligned holes make pulling cable a breeze.
Pull cable from the middle
Don’t rip open the plastic wrapper on your spool of cable. Instead, lift a handful of coils from the center of the roll and lay them on the floor. Four loops equal about 12 ft. Following this method helps decrease tangles and keeps the cable contained for easier transporting and storage. If you plan to use all of the cable, just carefully unroll the entire spool across the floor (as if it were a garden hose) to steer clear of kinks, curls or twists in the cable.
Avoid exposed open spaces
The electrical code doesn’t allow exposed wires in open spaces. When cable is installed in exposed areas such as a garage or an unfinished basement, it needs to closely follow the framing members. Cables that span stud spaces or ceiling joists are in continuous risk of nicks and cuts, and it’s too appealing to use the cables for tucking, hanging or trapping all kinds of toys and tools.
Straighten before pulling
Pulling cable through holes in framing is a lot easier if you straighten out the cable first. Walk along the length of the cable, straightening it between your thumb and forefinger as you go.
Once you’ve pulled the cable through the holes, push it back a bit to leave a small amount of slack. This is handy insurance in case you cut the cable a little short and need extra length, and it also allows other trades people a little slack to push your cable out of the way of plumbing pipes or ductwork.
Don’t over bend the cable
Sharp bends in cable can damage the sheathing and the conductors, which could lead to a fire hazard. Cable should not be bent at more than a 2-1/2-in. radius (about the same as a soda can). Avoid over bending it by drilling holes 8 to 12 in. above (or below) the boxes so the cable can sweep down or up into the boxes. And never pull hard on cable that has a staple on the other end.

Great tips
Important information
Such great post. I think all should follow these steps.