Plasterboard has become a reliable, energy-efficient, and sustainable construction material. It is widely used for residential and commercial purposes, and attached to studs when creating partition walls, or on masonry walls for a smoother finish ready for painting. Plasterboard is also used as a ceiling lining for architectural features such as arches, eaves, and textured or curved walls.
Inexpensive, versatile, relatively easy to use, and offering a host of benefits like improved fire and soundproofing, it is the material most owners choose in home improvement projects. Boards are easy to shape for the desired purpose, but the overall finish and stability, especially in corners and edges, will depend on necessities like plasterboard edge and angle bead.
What Is Plasterboard Bead?
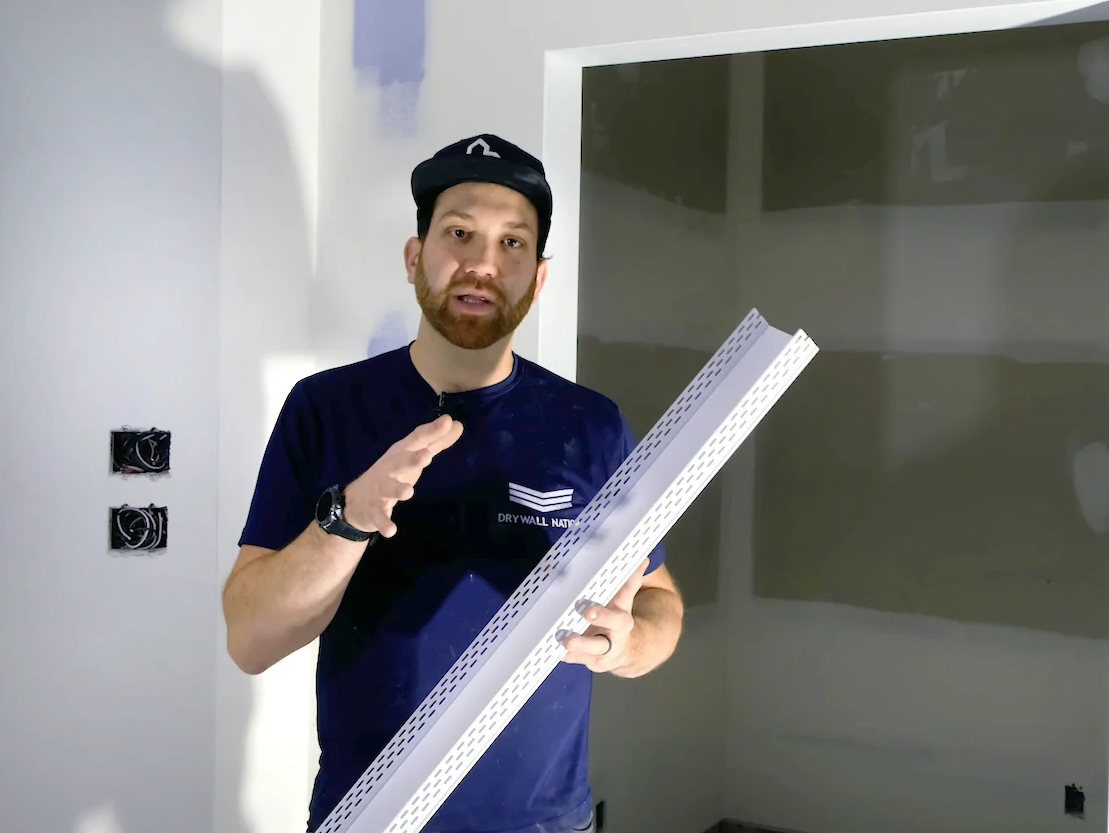
Edge and angle beads are thin, perforated metallic or plastic strips used to reinforce corners or edges lined with plasterboard, and help to create a nice, crisp finish. Angle beads are additionally found in corner edges around windows, stairwells, and columns, while edge beads are extensively used where boards meet solids edges, particularly doors. Beading is necessary for skim plastering or base coat plastering along with jointing compound and tape.
Angle Beads
Angle or corner beading is used for smooth edges where boards meet each other. They’re used both for external and internal corners and help protect them from damage. The long thin metal strips are set at 90 degrees with a rigid centre spine placed atop the corner apex and this allows for a clean, solid edge to plaster up to. Edges can be formed with plaster alone, but the beading prevents cracks, chips, or splintering in the plasterboard from knocks or impact.
Beading comes in different thicknesses, depending on the number of coatings you’re intending to use. Variants like thin coat angle bead still provide ample edge and corner protection, while also getting the crisp and clean finish you’re after. Lengths are the standard 2400mm or 3000mm and are easily cut to size with simple tin snips. Thin coat corner beads set at 90 degrees are also used for arches, whereas internal and internal wall beading at 135 degrees for more rounded corners is also sold. The latter allows for more versatility in different architectural and decorative plastering applications.
Edge Beads
Edge beads are used to reinforce plasterboard edges when next to doors, windows, or skirting boards. Often called stop beads because of the hooked design that snugly wraps around board edges and prevents movement, edge plasterboard bead comes in different widths to accommodate different plasterboard thickness. Lengths, however, are standardised at 3000mm, and like thin coat corner bead is easily cut to size.
Materials
Choosing the materials in angle and edge beads is all down to personal preference, but there are differences in terms of installation and flexibility, especially in durability upon impact. Metal corner beads are the traditionalist’s choice, particularly for indoor use. Galvanised steel thin coat angle bead is usually used here. For external walls, stainless steel fares better against the elements with higher corrosion resistance. Compared to vinyl or PVC corner beading, metal options fare slightly better in heavier knocks and impact, and retain form in most instances. The only downside is they are less flexible than their plastic counterparts.
Vinyl is a newer option. It appears both in angle and edge beads and retains a similar design as metal variants. Where vinyl is making new ground is its resistance to water and liquids, meaning it won’t rust in wet or conditions with high humidity. This is one advantage over metal beading. Others are the easier application of jointing compounds, due to differences in the design of spines. However, where thinner coats are needed, you’ll still want metal thin coat angle bead. These also retain strength along the entire length of the corners better, owing to better rigidity.
Design Variations
Corner bead comes in two slightly different designs. The first is with perforated edges stemming from the spine, and this is generally nailed into the plasterboard, typically with a nail gun or industrial stapler. The second type is with mesh edges and is applied with a skim plaster mix.
How to Install Angle Beads
There’s some flexibility in how corner beads are installed, though there are general steps to take to get the best finish. First, measure the length of the corner with a tape measure where the angle bead will be used. Next, cut the angle bead to the appropriate length, using either tin snips or a pair of heavy-duty scissors. Corners should be aligned at 45 degrees to fit seamlessly.
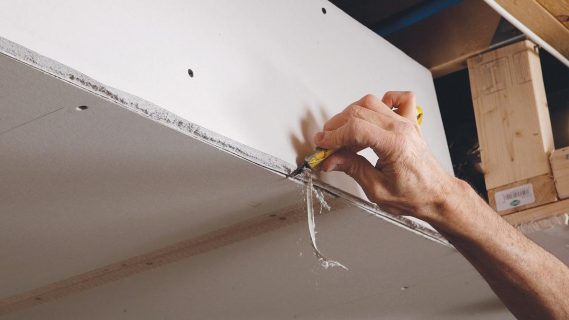
When attaching the corner bead to the plasterboard, there’s the choice of nails, screws, or staples. This means work is neater and you won’t be messing around with adhesives. Nails and screws will prove typically harder to work with and get right, as they’re less forgiving should you make a mistake. Most plasterers go with staple or brad guns, as staples and brads are easily removed, and won’t split the plasterboard.
Align the bead to the corner, making sure it is level. Staple the bead from the bottom upwards and at either end. Corners snipped to a neat 45-degree angle ensure a crisp connection between two separate beads, and prevent angle beads from expanding outwards. The beads can then be plastered over to the required thickness.
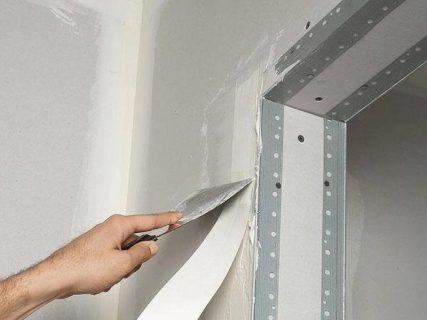
The process is somewhat different when angle beads connect plasterboard to brick, concrete, or coat base plaster. Here a skim plaster mix works best. This is applied with a trowel at equal distances along the length of the angle bead, then the bead is pushed into place, ensuring that is level and allowed to dry. Any excess plaster is then removed.
How to Install Edge Beads
Edge beads are more about dividing larger wall partitions into smaller and more manageable units before the final coat of plaster or paint is applied. Installation differs from angle beads in that they are first attached to the plasterboard, then the panels go in place. The beads are cut to size with tins snips or scissors, with the hooked side facing outwards. This makes securing and levelling separate panels together that much easier.
Final Word
Angle and edge beads are used for cleaner corners and flat finishes, as well as for keeping boards snugly in place. Once installed, corners, edges, and walls are easily plastered over to the desired thickness, so that beads vanish out of sight. Plasterers have the option of different designs and materials, with the end aim of getting clean, crisp finishes.