Understanding the plumbing construction process is critical whether you are renovating or building from the ground up. Home plumbing is divided into three phases: underground, above-ground (rough-in), and finishing. Each phase is critical to the success of your plumbing project.
In this article, we’ll go over each phase in detail, outlining how it works and advise you on how to ensure the plumbing project is a success.
Underground rough-in
As the first plumbing step, the underground rough-in phase lays the basis for a home’s plumbing system. This step entails completing and thoroughly testing all plumbing work performed below ground level. What happens during the underground plumbing phase?
The underground rough-in phase involves the strategic design and first physical construction of a home plumbing system, including the drain, waste, and vent (DWV) system layout.
Usually, the plumber will supervise the placement of water supply lines, drain installation, and pipe laying with the builder or general contractor. If necessary, the plumber will install pipes in the basement, position drains and inspect them to guarantee the ideal slope for smooth wastewater flow to the septic or sewage system.
As the famous saying goes, “Measure twice, cut once,” precise measures are essential. Inaccurate measurements can result in mistakes that must be fixed by cracking concrete, which can delay the project and add to costs.
The plumber needs to be ultra-cautious and ensure that everything is installed according to plan to ensure there is no need for plumbing repairs later on.
Testing the system is essential when the underground phase’s activities are completed. To verify air and water tightness, the plumber has to pressure test each joint and connection. After testing and ensuring that everything is where it’s supposed to be, only then should you lay the foundation and pour the concrete.
As a plumber, you should note that plenty of issues can arise during this stage. The common problems include:
Sand: Very simple to dig, but requires more digging and causes cave-ins.
Rocky terrain: This can cause delays because it can be challenging to break rocks.
Shale: Excavating in this soil type might take longer and require more work.
Wet conditions: It can be challenging to join pipes when it’s raining. You should use materials specifically designed for the surfaces to secure pipe joints.
Above ground rough-in
Plumbers will start installing the above-ground plumbing systems, which include everything behind the walls and above ground.
What happens during the above-ground plumbing phase? This phase includes a variety of tasks, such as installing pipes and fixtures, and the emphasis switches to installing gas and flue pipes, waste and vent pipes, and water supply lines.
Plumbers set up the water supply system and vent the DWV system during this phase. The plumbers need to know the exact positions of the fittings. Builders and their subcontractors frequently use fixture books or submittals to ensure installers know the locations of water and waste pipes.
During the second rough-in phase, plumbers undertake some testing to evaluate how the above-ground and subsurface plumbing interact. This entails sealing up pipes and adding water to ensure the system is leak-free. Sometimes, they do a vacuum test under the guidance of the local building codes.
The above-ground plumbing phase comes with its set of difficulties and challenges.
Communication between the different contractors working on the site is one of the main issues at this stage. To ensure correct installation and fixture placement, plumbers and electricians must work closely together.
To avoid any potential problems or conflicts, testing the electrical and plumbing interface is essential.
For an easier time, use supply boxes with a wide range of design options that will help you simplify water supply line installations. For instance, the robust interlocking wing flanges of the boxes support three-box, straddle-stud, and on-stud installations. The boxes also provide strength and ease of disassembly by the snap-locking mechanism.
The plumbing finishing phase
The finishing phase, also known as the trim-out phase of home building, is the third and last stage of plumbing. This phase entails laying tiles, painting, and drywall installation.
What takes place during the phase of plumbing finishing?
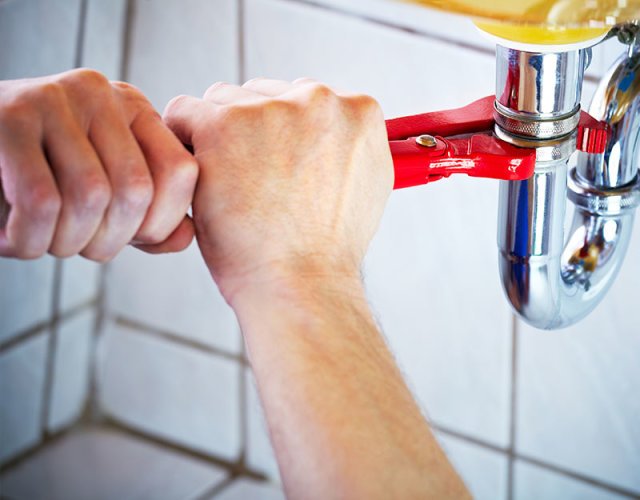
Plumbers install sinks and washing machines, set toilet flanges, and connect appliances to drains during this stage. Plumbers will caulk faucets, toilets, and other fixtures and install a trim kit to finish the bath waste and overflow system, depending on the style of the tub.
The plumbers will add hot water to the plumbing system during this final stage. The plumber can now collaborate with the homeowner or builder to adjust the water temperature.
As the last phase in the plumbing process, testing is essential. The plumber uses a manometer to help them identify even the tiniest variations in pressure.
Plumbers can ensure the system is sealed off from air and water by checking the system using a manometer to look for leaks. As a plumber, you should note that this exam releases you from liability for possible future problems.
This means that you should undertake the test and keep the relevant records.
Tips for success in construction plumbing
Patience and precision are required for any plumbing project at all three stages. As you progress through each level, keep the following guidelines in mind that apply to all areas of your plumbing journey:
Invest in Reliable Materials: Saving money should not be at the expense of long-term quality. Choose materials that are designed to withstand corrosion and degradation.
Document everything. You should keep a detailed record of all changes and decisions made. You may not be looking over these notes right now, but a documented history could be beneficial during future restorations or repairs.
Safety First: Wear personal protection equipment, adhere to safety requirements, and recognize when a task is beyond your scope.
Know when to call a professional: You can decide to save money and go the DIY route and while it is commendable, some tasks necessitate the skilled help of a certified professional. Be honest about your ability level and ask for help when necessary.
Parting shot
It’s vital that you understand the three phases as they will help you better understand your plumbing system. Whether you’re building a new home, upgrading, or repairing leaks, with this knowledge, you can efficiently handle your next plumbing project, ensuring everything runs successfully.
