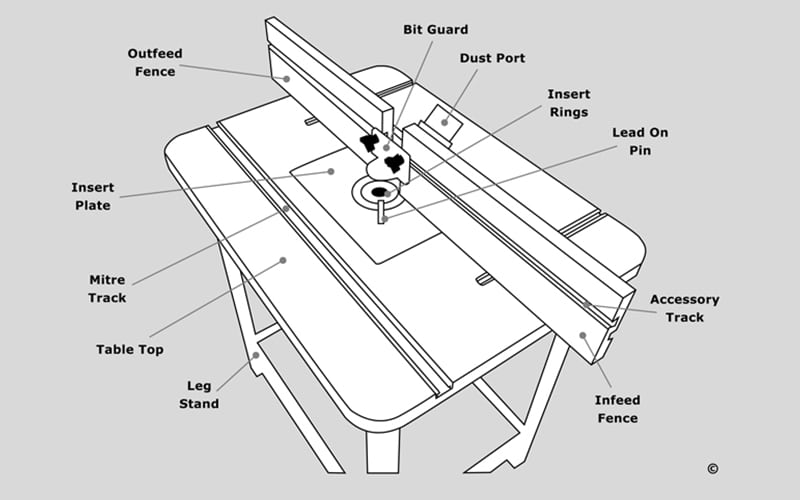
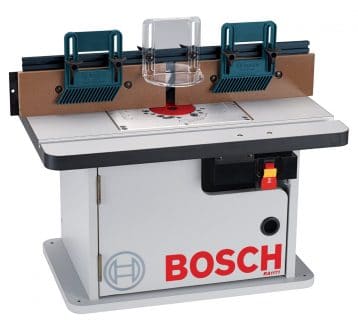
If you are new to the wood router it can be a bit daunting to use for beginners.
The wood router rotates at thousands of revolutions per minute and is quite a noisy machine.
The truth is though once you have actually operated a wood router it is much less scary than you thought it would be.
The wood router table does take some practice to set up correctly but once you have done that a few times it quickly becomes quite a simple process.
It will take a few attempts before you start to improve on your accuracy but once you work out what goes where and how to best align your work piece it is going to be an enjoyable experience with quality routing and clean cuts.
More in depth information on router tables is available on many sites and I have found power tool sites like Tool Inspector will drill down in to the nitty gritty and give you a head start on starting on your own.
Where to start
Your first job will be to attach the wood router to the base plate on the router table using the little bolts provided.
Most of the wood routers available on the market now have the option of accepting a 1/4 inch or 1/2 inch router bits.
The collet which is the steel housing or sleeve the router bit sits are now made to accommodate both sizes of router bit.
Always kill the power to the wood router before you start the process of installing your router bit because on slip on the trigger could be catastrophic for your fingers and hand.
Installation of router bits
When you insert your router bit in the wood router you should leave a space for the heat expansion router bits go through. Always check the manufacturer’s instructions on the exact space you should leave.
But the depth of the router bit will need to be adjusted to the depth you want to route at.
You should tighten the collet nice and tight without going overboard as you don’t want to damage the fixing nut.
Once you have chosen the pattern you are looking for and fitted the router bit it is time to set up the router table so you are perfectly lined up with the parts of the wood you will be routing out.
Router table fence set-up
The router table fence is key to get right as your router will be using this as a guide.
When you are guiding the wood router along the fence and around the table it doesn’t matter which way the router is facing as the router has a round base and is the bit is the same distance from its edge no matter where you push it against.
Once the fence is set up and ready to go then I like to now fit the dust extraction system, I do it this way round because it then saves the dust pipe that is collecting the dust from getting in the way when I am setting up the fence and installing the router bit.
Dust extraction
It is very important that you set up the dust extraction and also wear a good quality dust mask, not one of the cheap paper ones but one with cartages that can be replaced once they are past there best.
This is so important because some wood dust is known to be extremely bad for your health when breathed in and can shorten your life.
Don’t be fooled by thinking the dust extraction will be enough because although it largely reduces it, it can’t remove all the dust that is created and it will still be thrown into the air.
You will also need goggles as the dust can really irritate eyes and scratch the surface of them.
Before you start double-check everything so there is no problems with depth or alignment.
Okay, we are all set up and ready to start working, start off slow, and take your time, and don’t forget you need to operate by feeding the wood in from the right to left so it doesn’t bite large chunks out.
If you are routing a deep groove then it is better to do it in a couple of runs and not try to remove it all in one go.
DIY made router table vs pre-built manufactured router table
This will mainly depend on your circumstances and what you will be working with.
For the person who is working on smaller wood work-pieces like doors, kitchen doors, and decorative boxes the pre-built models are more than adequate enough for that type of work and even bigger tasks.
The manufactured model is also much easier to set up for the beginner and that makes it more first-time user friendly. They are available at around $200 for a good quality router table top.
Where the Home built one has the advantage is it can be custom built to fit into your workshop perfectly.
It can also be built to any size so you work with really large wooden boards and sheets and you are only limited by the size of your workshop.
The DIY built router table will also be cheaper to produce with a good quality one being able to be built for $100 for a good-sized one.
You will need to quite familiar with how the router table needs setting up because you will have to work out all the details yourself.
You can find plans for these online and that is a good idea if you are not 100% sure about it all.
I hope this helps you in getting started, if you have any questions please feel free to comment below.


