The goal for a Heating, Ventilation and Air Conditioning (HVAC) system is to provide proper air flow, heating, and cooling to each room more so during this cold season. The HVAC System distributes conditioned air by means of flexible, pre-insulated, 2-inch inside diameter tubing, which is fed through wall structures and around obstructions.
Many home designers choose such this system because they do not have to design a unique structure to hide the heating and cooling system components.The 10 steps to a successful installation are:
1.Find a Suitable Location for the Fan Coil Unit
The initial consideration is the location of the fan coil unit. The fan coil unit may be located in an unconditioned space. Areas such as an attic, garage, or crawl space are acceptable as long as the location is protected from the weather and local codes are met. The fan coil unit may also be located in a conditioned space such as a basement, closet, or utility room. Two types of fan coil configuration offered are horizontal and vertical cabinets.
One must also consider the location of the return air filter box and duct. Another important consideration is the location of the 9-inch inside diameter plenum, air supply tubing, refrigerant lines, and condensate drain line.
2.Cut the Return Air Opening
Cut the return air opening. Select your exact location for the return air duct. Avoid installing the return air box in a dining room, living room, or kitchen unless the air duct can be installed with a 180-degree bend.
Once the opening is cut based on the size and dimensions of the return air opening, the fan coil may be passed through the opening.
The return air box is designed to fit between joists that are 16 inches on center with a 14-inch width. For wall applications such as when using a vertical free-standing fan coil unit, be sure the opening will allow for a 90-degree bend in the return air duct. However, do not install the return air box until your installation is complete because you may want to pass materials for your installation through this opening.
3.Build a Platform
You can construct a simple platform based on the size of the fan coil unit. It is recommended to use 2- by 8-inch stud lumber and a minimum of 1/2-inch plywood for platform construction.Also use the provided isolation strips under the unit for best performance.
For locations where the fan coil unit must be suspended, suspend the platform overhead by 1/4-inch threaded rods. Never connect a threaded rod directly to the fan coil cabinet. It’s not necessary to secure the fan coil unit to the platform because the weight of the unit will hold it in position.
4.Attach Supply Plenum Ring
The supply plenum ring will be several inches lower than the bottom of the fan coil unit.move the fan coil past the platform edge to accommodate the plenum ring.Then attach the plenum ring to a square opening with four screws provided. In addition, be sure to attach the plenum ring gasket to the fan coil cabinet before mounting the supply plenum ring.
5.Connect the Condensate Drain
Connect the condensate drain trap to the fan coil unit. Run the condensate drain line from the trap to a suitable drain in accordance with local codes. Be sure that the drain line is pitched 1/4 inch per foot
6.Connect Refrigerant Lines
Connect the refrigerant lines from the outdoor condensing unit to the indoor fan coil unit.
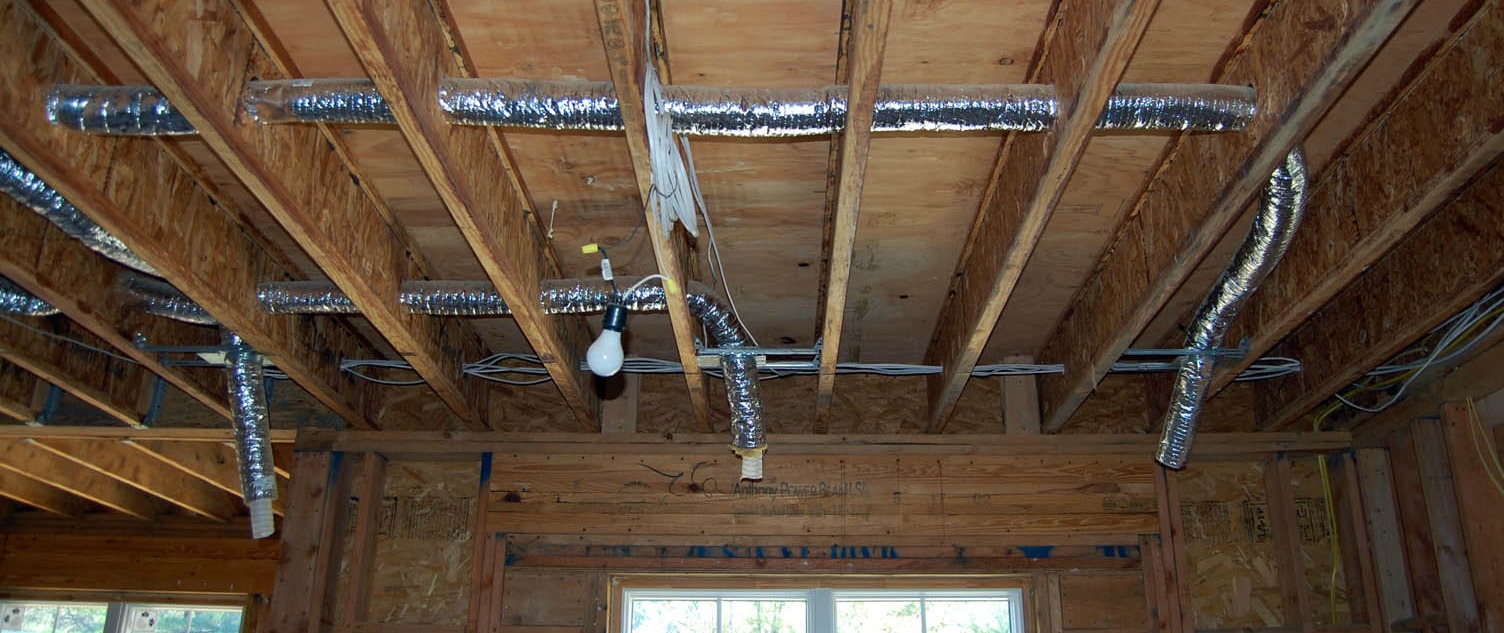
7.Connect Supply Tubing and Plenum Duct
When installing the air distribution components,do a system layout based on your sizing parameters. The plenum duct may be run in practically any location that is accessible for the attachment of the supply tubing.
When installing the plenum to the unit, cut off the male end of the first section. Then insert the plenum duct section into the receiving collar on the fan coil unit.push the duct in tight to form a snug joint then flatten the sheet metal tabs against the plenum duct and insert the flat head pins. Next, wrap and tape in place the 6-inch-wide piece of foil face insulation over the taped joint. Be sure the insulation is pushed up against the fan coil unit.
Once your plenum duct has been installed, the plenum end cap will now go on the end of your plenum run. The plenum end cap contains an insulated cushion that is pushed up tight against the duct end. Hold the end cap firmly in place, then insert the flat head pins through the sheet metal tabs at the end of the cap. Cross-tape the end cap securely with a circumferential wrap around the end cap.
8.Install Terminator Outlets and Sound Attenuation Tubing
Mark the locations where you would like to install the room terminator of the HVAC System ensuring the center of the terminator is 5 inches from a wall edge. When installed in a room-ceiling corner, the location should be 5 inches from each wall edge.
Drill a 1/8-inch hole for the outlet and allow at least 2 inches of clearance all around the 1/8-inch hole. After all clearances have been checked, use a 4-inch hole saw to cut a hole, using the 1/8-inch hole as your pilot.
Next assemble the room terminator to the sound attenuating tubing by fitting the connectors together and twisting until tight. If the terminator is being installed in a floor location, you must fabricate a small 1/4- by 1-1/2-inch-square screen and place the screen between the terminator faceplate and the tubing connector. Then push the free end of the sound attenuating tubing through the 4-inch hole until the toggles on the terminator snap into place. Center the two spring clips on a line parallel to the direction of the tubing so the faceplate doesn’t pull away from the ceiling.
9.Install Supply Tubing
Cut your supply tubing to the proper length. The minimum length is 6 feet and the maximum is 30 feet with attenuator. Then install the connector to the tubing by threading it into the cut end of the tubing.
Tuck the insulation and Mylar scrim under the collar of the connector then wrap tape around the connector to secure the two pieces together. Finally, install the connectors together by using a twist action until they are secured.
At the plenum location you have selected, cut a 2-inch hole in the plenum with the hole cutter. Be sure that your hole is at a 20-degree down angle to eliminate a strain on the plenum.
Next, place the plenum takeoff gasket around the hole. Then place the plenum takeoff connector into the hole in the plenum. Orient the plenum takeoff to match the curvature of the plenum duct. Insert the plenum fasteners by hand one at a time.
Using pliers, snap the fasteners into place and install a connector into the remaining open end of the supply tubing following the same procedure as before. Then connect the connector from the tubing to the plenum takeoff following the twisting action used to connect the connectors. You have now completed your supply run.
Once you have completed your supply run installations for the HVAC System, return the air duct and air box. Remove the return air grille and filter from the return air box assembly. Insert the return air box into the return air opening you cut earlier and fasten the frame with four screws through the holes provided on the long side of the box. Then, insert the return air grille into the box and fasten with the four screws provided. Open the grille and insert the filter. Then connect each end of the return air flexible duct to the elliptical end of the fan coil and the return air box connections with the clamp bands.
10.Electrical Connections
Locate the room thermostat on a wall near the return air box about 48 inches from the floor. Connect the low voltage thermostat wiring to the low voltage control block in the unit.The fan coil unit must be connected to a separate circuit using a 15-Amp fuse and 14-gauge wire. The electrical service requirement is 208/230/60/1 power supply.
Comments
One response to “10 Steps to Installing a High-Velocity HVAC System”
That is most legitimate information, every steps coverved broad and micro levels. Beig a Hvac service provider, I didn’t suppose to find that kind of informatioin.
Thanks.