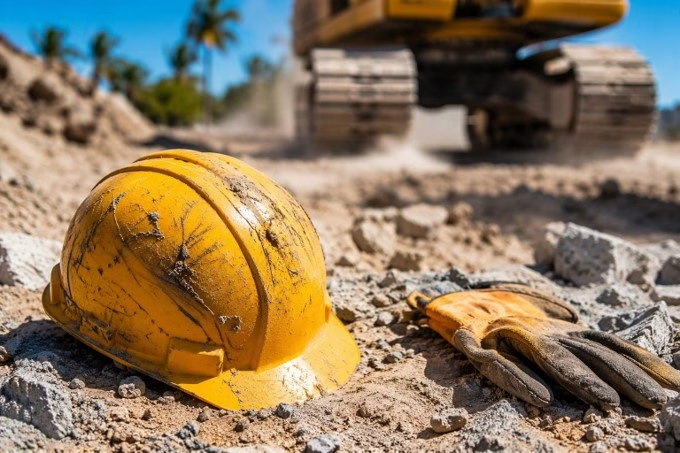
A construction site changes fast after an accident. Equipment gets repaired, debris gets hauled away, crews rotate to the next project, and camera footage is overwritten on schedules no worker controls. Census of Fatal Occupational Injuries data recorded 88 Florida construction-sector workplace deaths in 2024, the highest total of any industry in the state. Proof can disappear before anyone thinks to preserve it. Your safety comes first. If your injury needs urgent care, get that care first and let someone else handle the evidence.
Workers’ Compensation vs. Third-Party Claims: Florida workers’ compensation is a no-fault system (Fla. Stat. § 440.11), meaning you do not need to prove negligence to receive medical and wage benefits. However, detailed evidence of site conditions, equipment serial numbers, and non-employer witnesses is vital if you plan to file a third-party personal injury lawsuit against a negligent contractor, manufacturer, or site owner.
Construction Site Injury Claims Guide: Act in This Order
The first hours and days can determine what proof survives. Work through these steps in order when circumstances allow:
- Get emergency care and protect personal safety.
- Report the injury and create a written record.
- Photograph or record the site before it changes.
- Identify witnesses and preserve their contact details.
- Secure clothing, protective equipment, and related records.
- Delegate evidence collection if the worker cannot act.
- Organize medical, employment, and financial documents.
The sequence is practical, not absolute. If a worker needs emergency treatment, they should leave evidence collection to someone else, which is why Step 6 exists.
Step 1: Get Medical Care Before Collecting Evidence
Your health comes first.
Call 911 or seek prompt medical assessment if an injury is serious, worsening, or not fully understood. Some injuries, including internal damage and head trauma, may reveal their severity hours later. Never delay treatment to photograph the site. A coworker or relative can document it safely.
Make the Medical Record Specific
When speaking with medical personnel, describe how the workplace injury occurred as accurately as possible. Say whether you fell or were struck by equipment. Identify the body areas affected, report symptoms that appeared after you left the site, and keep any work restrictions or follow-up instructions you receive. Do not exaggerate or try to assign fault in the exam room.
Preserve the First Treatment Records
Save discharge papers, visit summaries, work notes, prescriptions, and referral instructions. Each record should clearly show its date and the provider’s name. Those first documents anchor the treatment timeline.
| Benefits | Limitations
|
| Protects the worker’s health and creates an early medical record. | Initial records may not include symptoms that emerge later. |
| Documents diagnoses, restrictions, and follow-up instructions. | If you leave for treatment, someone else may need to document the site. |
Step 2: Report the Injury and Create a Verifiable Record
Notify your employer promptly. Do not wait to see whether the injury resolves on its own. Section 440.185 of the Florida Statutes requires an employee to report within 30 days. Missing this deadline can result in a complete forfeiture of benefits unless a statutory exception applies. The statute contains exceptions, but prompt notice creates a clearer record and may prevent a dispute about when the employer learned of the injury.
That 30-day window is where Florida claims tend to get complicated, because the reporting deadline and the evidence-preservation tasks run on the same clock. A construction site injury claims guide built around Florida’s rules covers what to file in that first month, which records carry weight with employers and insurers, and how to sequence the two. It provides general information and does not replace individualized medical or legal advice.
Record Who Received the Report
Write down the date and time of your report. Note the name and position of the person you notified, the accident location, and how you delivered the notice. If an incident report exists, request a copy. If you reported the injury orally, send a short written follow-up stating the facts and retain a copy.
State what happened plainly. Do not guess about equipment failures, code violations, or responsibility. Guessing creates contradictions.
| Benefits | Limitations
|
| Creates a dated record showing when and how notice was given. | An initial report may omit symptoms or details that become clear later. |
| Written notice should state the injury’s date, time, place, and nature, along with the injured person’s name and address. | Florida Division of Workers’ Compensation guidelines recommend providing prompt written notice to create an indisputable record. |
Step 3: Photograph the Scene Before Conditions Change
Photographs and video should capture context and close details. Take images only when it is safe and permitted. Do not enter a restricted work area, interfere with operations, move evidence, or trespass for a better angle. The same restrictions apply to relatives.
The fatality data point to what deserves the camera’s attention. Falls, slips, and trips caused 39 of Florida construction’s 88 workplace deaths in 2024, more than any other type of fatal event in the sector. When relevant to the incident, photograph elevation changes, access routes, guardrails, openings, ladders, scaffolds, and the surrounding work area. That figure describes fatal events, not injury diagnoses, so treat it as a guide to hazards worth documenting rather than a prediction about your case.
Which Injuries Occur Most Often on Construction Sites?
Sprains, strains, and tears are among the most common nonfatal injuries on construction sites. Falls, overexertion, equipment incidents, and contact with objects can also cause fractures, cuts, head trauma, and other injuries, so the relevant evidence depends on how the accident happened.
Capture the Wide View and Critical Details
Document the following before conditions change:
- Wide shots showing the work area and access route
- Medium views connecting the hazard to nearby equipment or structures
- Close views of damaged components, substances, debris, labels, or controls
- The worker’s visible injuries, photographed over time when appropriate
- Equipment identification plates, serial numbers, warning labels, and inspection tags
- Weather, lighting, floor conditions, and temporary barriers
- The position of tools or materials without moving them
- Images that retain timestamps or other available metadata
Retain the original files. Do not edit them, apply filters, annotate the only copy, or post the material on social media.
Record What Cannot Be Photographed
Make a dated note describing sounds, odors, conversations, alarms, lighting, weather, and site activity that a still image cannot capture. Separate direct observations from assumptions, and label any assumptions clearly.
| Benefits | Limitations
|
| Preserves visible conditions before equipment, debris, or barriers are moved. | Images may not capture sounds, odors, timing, or events outside the frame. |
| Records equipment labels, site layout, and relevant physical details. | Access restrictions and safety hazards may prevent complete documentation. |
Step 4: Identify Witnesses Before Crews Rotate
Useful witnesses are not limited to coworkers standing nearby. A delivery driver might have seen the condition before the accident. So might a subcontractor, an equipment operator, or a visitor from an adjacent work area.
Collect Contact Details Without Shaping the Account
Record each witness’s full name. Add personal contact information when it is voluntarily provided, the person’s employer or trade, an approximate location during the incident, and a short note about what the person may have observed. Do not pressure anyone, rehearse accounts, or ask a witness to adopt your explanation.
Note anyone who took photographs or video. If a witness declines to share contact information, record the name, employer, job role, and work location if known. That information may help locate the person later.
| Benefits | Limitations
|
| Helps identify people who observed the accident or earlier site conditions. | Memories can change or become less specific over time. |
| May reveal additional photographs, videos, or relevant records. | Witnesses may decline to provide personal contact information or a statement. |
Step 5: Preserve Safety Gear and Claim Documents
Construction injury claim documents include physical items as well as paper and digital records. Keep them in their original condition whenever possible.
The construction injury claim documents needed in a particular case vary, but the goal is to preserve original physical items, paper records, and digital files.
Store Clothing and Personal Protective Equipment
Set aside every personally held item involved in the incident, including hard hats, safety glasses, gloves, boots, harnesses, and high-visibility clothing. Do not wash, repair, discard, test, or alter an item that may contain damage or residue. Photograph each item before storing it. Place dry items separately in clean containers, and label each container with the item, the date, and the name of the person who stored it.
Do not take employer-owned equipment from the site without authorization. For employer-owned machinery or tools, record identifying information and make a written preservation request through an appropriate channel.
Retain Digital and Project Records
Keep accident reports, text messages, emails, and schedules you already possess. Retain training records, photographs, pay records, and written work restrictions. Other parties may control surveillance footage, inspection records, maintenance records, and project documents. Note that these materials exist; do not attempt to access protected systems.
| Benefits | Limitations
|
| Preserves physical damage, residue, labels, and other details for later review. | Improper handling or storage can alter or contaminate an item. |
| Keeps relevant communications and records together. | Many project records and equipment items remain under another party’s control. |
Step 6: Delegate Evidence Collection When the Worker Cannot Act
A trusted person can help document what happened.
When an injured worker is unconscious, hospitalized, immobilized, medicated, or otherwise unable to collect evidence, a relative or trusted coworker can coordinate information without entering a dangerous or restricted area. The helper should begin with information lawfully available outside the controlled site.
Give the Helper a Safe Assignment
Start at the hospital. Record the facility’s name and the treating providers so you can identify the relevant records later. Preserve the worker’s phone, including messages, photographs, and documents. Write down the names of supervisors and coworkers as they become known.
Ask witnesses to retain original photographs or video rather than sending only compressed copies. Photograph any clothing and personal equipment already returned to the family. Keep a dated activity log showing who collected each item.
Protect Originals and Record Custody
Use a simple custody record. Note who received each item, where it was stored, and when it changed hands. Keep original digital files intact and create separate working copies.
A relative should preserve only what is lawfully available. The helper should not enter the site without permission, remove company property, impersonate the worker, or pressure witnesses.
| Benefits | Limitations
|
| Allows preservation work to continue while the injured person receives care. | The helper may have limited access to the site or company-controlled records. |
| Creates a record of who collected and stored each item. | Poor coordination can produce duplicate files, missing details, or custody gaps. |
Step 7: Organize Medical, Work, and Financial Records
Evidence preservation continues after the site changes. Build a dated folder structure connecting medical treatment, missed work, out-of-pocket costs, and communications to the accident.
Build a Chronology, Not a Paper Pile
Organize records by date and category. Keep medical bills with treatment summaries, and file work restrictions beside return-to-work notes. Save pay stubs and time records in their own folder. Keep receipts for prescriptions and treatment-related travel. File insurance correspondence separately from employer communications about scheduling or modified duty.
Florida does not have a fixed payout for every workplace injury. Available benefits depend on the facts of the case, including authorized medical treatment, earnings, and the nature and duration of any work restrictions.
| Benefits | Limitations
|
| Creates a clear timeline connecting treatment, work restrictions, and expenses. | Missing dates or documents can leave gaps in the chronology. |
| Makes records easier to locate and share when necessary. | Files require regular updates as treatment and communications continue. |
Preserve the Record Without Putting Recovery at Risk
If the accident just happened, start small. Save original photo files without editing them. Store and label dry clothing or personal equipment. Place the first medical records in a folder marked with the correct date. Preserve what is safely and lawfully available without delaying treatment or entering a restricted area.
The rest can wait for the people whose job it is. Treatment comes first, reporting comes within the month, and every other step on this list gets easier the sooner someone starts it.