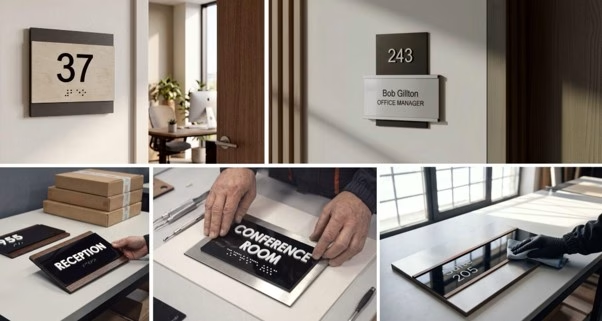
A sign schedule helps keep a signage project organized from design approval to installation. It gives designers, project managers, buyers, and fabricators one shared reference for sign text, dimensions, materials, finishes, locations, and mounting requirements.
When information is incomplete or spread across drawings, emails, and separate documents, small discrepancies can lead to production delays or signs that do not match the approved design. A clear schedule helps the project team identify missing details before fabrication begins.
One Row Per Sign, One Source of Truth
A sign schedule works like a door schedule or a finish schedule: each sign gets its own entry, and that entry is the reference everyone checks against. Architects use it to confirm intent, contractors use it to confirm what they are installing, and the fabricator uses it to confirm what they are producing.
The format matters less than the discipline. A spreadsheet is enough for most projects. What matters is that there is one current version, that it has a clear owner, and that anyone who needs to change a sign changes it there rather than in a side conversation.
The Fields Worth Recording
The following fields cover what a fabricator typically needs. Adjust the list to the project, but think carefully before removing any of them.
Sign ID. A short unique code for each sign, such as a type letter plus a sequence number. The ID is what lets the architect, contractor, and fabricator refer to the same sign without describing it. Keep it stable: if a sign is deleted, retire its ID instead of reusing it for a different sign.
Room or location reference. The room number or name as it appears on the current plans, plus the floor or zone. If the project has a numbering convention that differs between the architectural drawings and what the owner wants displayed to visitors, record both and mark which one is printed on the sign.
Sign text. Enter the exact text as it should be produced, including capitalization, abbreviations, line breaks, and any pictograms or secondary language. Copy it from the approved source, such as the owner’s room-naming list or the tenant’s confirmed name, instead of retyping it from memory. For tactile and Braille signs, note that the Braille translation follows the final text, so any text change reopens that line.
Dimensions. Overall width and height, and thickness if it affects mounting or clearance. Record the size that was approved, not an approximate size from an early concept.
Material and finish. Name the base material, the surface finish, and the way graphics are applied, based on the specification sheet for the product you are ordering. If the supplier’s data for a material lists performance characteristics such as resistance to scratches, moisture, or cleaning agents, copy those from the supplier’s documentation and avoid paraphrasing from general knowledge.
Mounting method. Specify the method and the substrate it attaches to: drywall, glass, masonry, metal frame, and so on. The substrate drives the choice of fixing, so it belongs in the same row.
Quantity. Many signs repeat across floors or suites. Quantity per type is useful, but keep a separate row or sub-list for any variants that differ in text.
Installation location. Describe where on the wall or door the sign goes, and which side of the door it goes on. If the sign is subject to accessibility requirements, state the requirement it is being checked against rather than assuming it from the product type. Tactile and Braille signs in the United States, for example, are addressed in Section 703 of the 2010 ADA Standards for Accessible Design, and a sign is compliant only when it meets all provisions that apply to its type and location. The presence of Braille alone does not establish that.
Approved design reference. Link or cite the artwork file, version, and approval date. If the sign follows a layout template, name the template.
Status and revision. A short status such as draft, approved, or released to production, with a revision date. This single column answers most late-stage questions.
Connecting the Schedule to Plans, Drawings, and Samples
The schedule is most useful when it points to the rest of the documentation instead of duplicating it.
Reference the floor plan sheet number that shows each sign’s location, and use the same IDs on the plan markup. When a room is renumbered on the plan, the schedule row for that sign should be updated in the same revision cycle, with the plan version noted.
If the project includes detailed drawings, such as a mounting detail for a sign set into a storefront system or fixed to a curtain wall, cite the detail number in the mounting column. Where the project calls for an approved sample or mock-up, record the approval in the design reference column so the fabricator knows which version governs.
Not every project needs this level of paperwork. A small office with a dozen signs may be fully served by a clear schedule and a proof. Larger or more complex projects may call for detailed drawings and sample approvals. The schedule should record whichever of these the project actually uses, and no more.
Where Incomplete Data Causes Trouble
Incomplete or outdated schedules tend to fail in a few recognizable ways, and each maps to a missing or stale field:
- Outdated text. The department name changed after the text was collected, and no revision status flagged the row. A “last confirmed” date next to the text would have exposed it.
- Wrong mounting for the substrate. The mounting column said “adhesive” without naming the wall type. A glass partition needs a different approach than drywall, and the row never recorded which one applied.
- Superseded room number. The schedule was built from an early plan and never reconciled with the latest sheet. Citing the plan version would have made the gap visible.
Other common problems follow the same pattern: duplicate IDs that cause two rooms to receive the same sign, dimensions pulled from a mock-up that was later resized, and quantities that include variants nobody listed separately.
Reviewing the Schedule Before Production
When it is time to place the order, the real work is verifying the schedule, not producing it. A practical review sequence:
- Reconcile with the current plans. Walk through every row against the latest floor plan sheet. Confirm room numbers, names, and locations.
- Verify text against its source. Check each line against the owner’s naming list or the tenant’s written confirmation. Have someone other than the author do this.
- Check substrate and mounting. Ask the contractor to confirm the wall or door type at each location, particularly for glass, tile, or demountable partitions.
- Confirm accessibility requirements. For signs that need tactile characters or Braille, confirm which requirements apply to each sign type and that the specification matches them.
- Match approvals to rows. Every row marked “approved” should have a version of the artwork and a date.
- Freeze and issue. Mark the schedule as released and send that version, with its revision number, to the supplier.
When placing an order for custom door signs, an incomplete sign schedule can lead to revisions, delays, or incorrect specifications. Recording the text, dimensions, materials, mounting method, and approved design for each sign helps keep production aligned with the project’s requirements.
Controlling Changes After Release
Changes after release are normal. Tenants rebrand, rooms get renumbered, and a wall type turns out to differ from the drawings. The risk lies in changes that reach the fabricator informally.
Set a simple rule: a change exists only when it appears in the schedule with a new revision date. When a change arrives by email or phone, the schedule owner updates the row, increments the revision, and sends the updated schedule to the supplier. Signs already in production are identified by their previous revision, which lets the team decide quickly whether to correct, remake, or accept them.
Keep the superseded versions. When a question arises at handover about why a sign reads the way it does, the revision history answers it.
A Short Pre-Order Checklist
Before sending a schedule to production, confirm that:
- every sign has a unique, stable ID;
- each row cites the plan sheet and version it was checked against;
- text has been verified against a named source and a second reader;
- the mounting method names the substrate it fixes to;
- material and finish entries match the supplier’s own specification data;
- accessibility requirements are identified per sign type, not assumed;
- every approved design has a version and date;
- the schedule carries a revision number, and the supplier has that exact version.